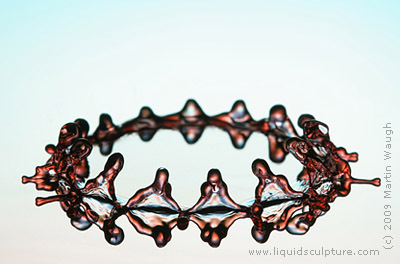
Every now and then I get a question about managing depth of field in drop photographs. Indeed, it can be a bit frustrating.
Depth of field is a perennial problem with macro photography. It’s just the physics of it. The depth of field is shallower with higher magnification, so it makes little difference which lens you use, as long as you still magnify the same amount (I have a Java-based depth of field simulator where you can play around with these variables.)
There are three things you can do to get more depth of field; they all have their trade-offs:
- Use a smaller aperture – this requires more light and hazards loss of sharpness due to diffraction
- Back up some and crop – you will have a better depth of field, at the expense of resolution.
- Choose a camera with a smaller sensor – unfortunately, these usually have fewer pixels than a larger sensor, so again, you lose resolution, and they often don’t have as good of noise immunity.
It is often said (in fact, I just said it myself) that it makes no difference which lens you use as long as you use the same magnification. Well, this is a bit misleading. The mathematics are the same, but the visual effect is noticeably different. With a short lens, the background is not magnified as much as it is with a long lens, so it appears to be in better focus.
Having said all this, I often have to very carefully set my focus point (I use a macro slider to move the camera a bit closer or farther). It always seems to be a delicate balance.
On the other hand, a little bit of blurring toward the back does help give a sense of depth and even intimacy.

Hi Martin,
Thank you again for your email! I found your blog and checked all the other questions and answers. Very informative indeed!
You are the master of capturing liquids and I can’t wait to see what you will do next!!!! 🙂
I will be back here with more questions…But now it’s time to take some more pictures of water drops…
I agree with you that blurring the background creates real beauty in contrast with a sharp/in focus drop or splash. Now I’m off to working on getting my crown in focus all around…
best
elisaveta
One more thing: the above image of the ‘water drops holding hands’ I called it, I love how the back is not in focus, it really works well with the drops creations, but in the ‘crown’ it looks much better when it’s all in focus…the ‘crowns’ you have created are amazing!! 🙂
elisaveta
Hi Martin, I know that perspective correction lenses are out of reach to a lot of people but they effectively extend the depth of field by “tilting” the plane of focus to suit the field you need in focus. It’s the same principle that landscape photographers use to get pin sharp focus from close through to infinity with their field camera movements…
Have you ever tried these types of lenses…?
Malcolm,
That’s a good idea. Tilt/shift lens do provide a lot more creativity and stunning effects.
I have played a bit with a tilt/shift bellows system with my work, but it was borrowed, so I didn’t have much time with it. From what I saw, the results were different, but not startlingly so. I should spend more time with it. Thanks for the suggestion.
The physics behind the tilt effect is called the “Scheimpflug principle”. One curious result is that the depth of field “volume” becomes wedge-shaped with the front and back planes being non-parallel.
Martin
Hi Martin
I agree with you a little bit of blurring towards the back really adds to the photo. Your work has been very inspirational to me. I’ve been doing this now for almost a year I’ve upgraded my equipment from a canon 20D to a Canon 50D and I now have two 580EX’s and I am just weeks away from buying a stopshot system. I was wondering are you or have you done any new work? I really enjoy looking at your work and I hope to buy at least one someday. Thank you very much for sharing your work, and keep up the amazing work.
Pingback: Elisaveta stoilova | AccelNow